Complete Integration Workflow
- Design your chat experience in UI Kit Builder.
- Export your Flutter package with configuration JSON, assets, and helper files.
- Enable advanced features in the CometChat Dashboard if your experience requires them.
- Optionally explore the sample module to preview the UI Kit Builder experience.
- Integrate the UI Kit Builder module into your Flutter project.
- Customize the UI further with the Flutter UI Kit components and styling APIs.
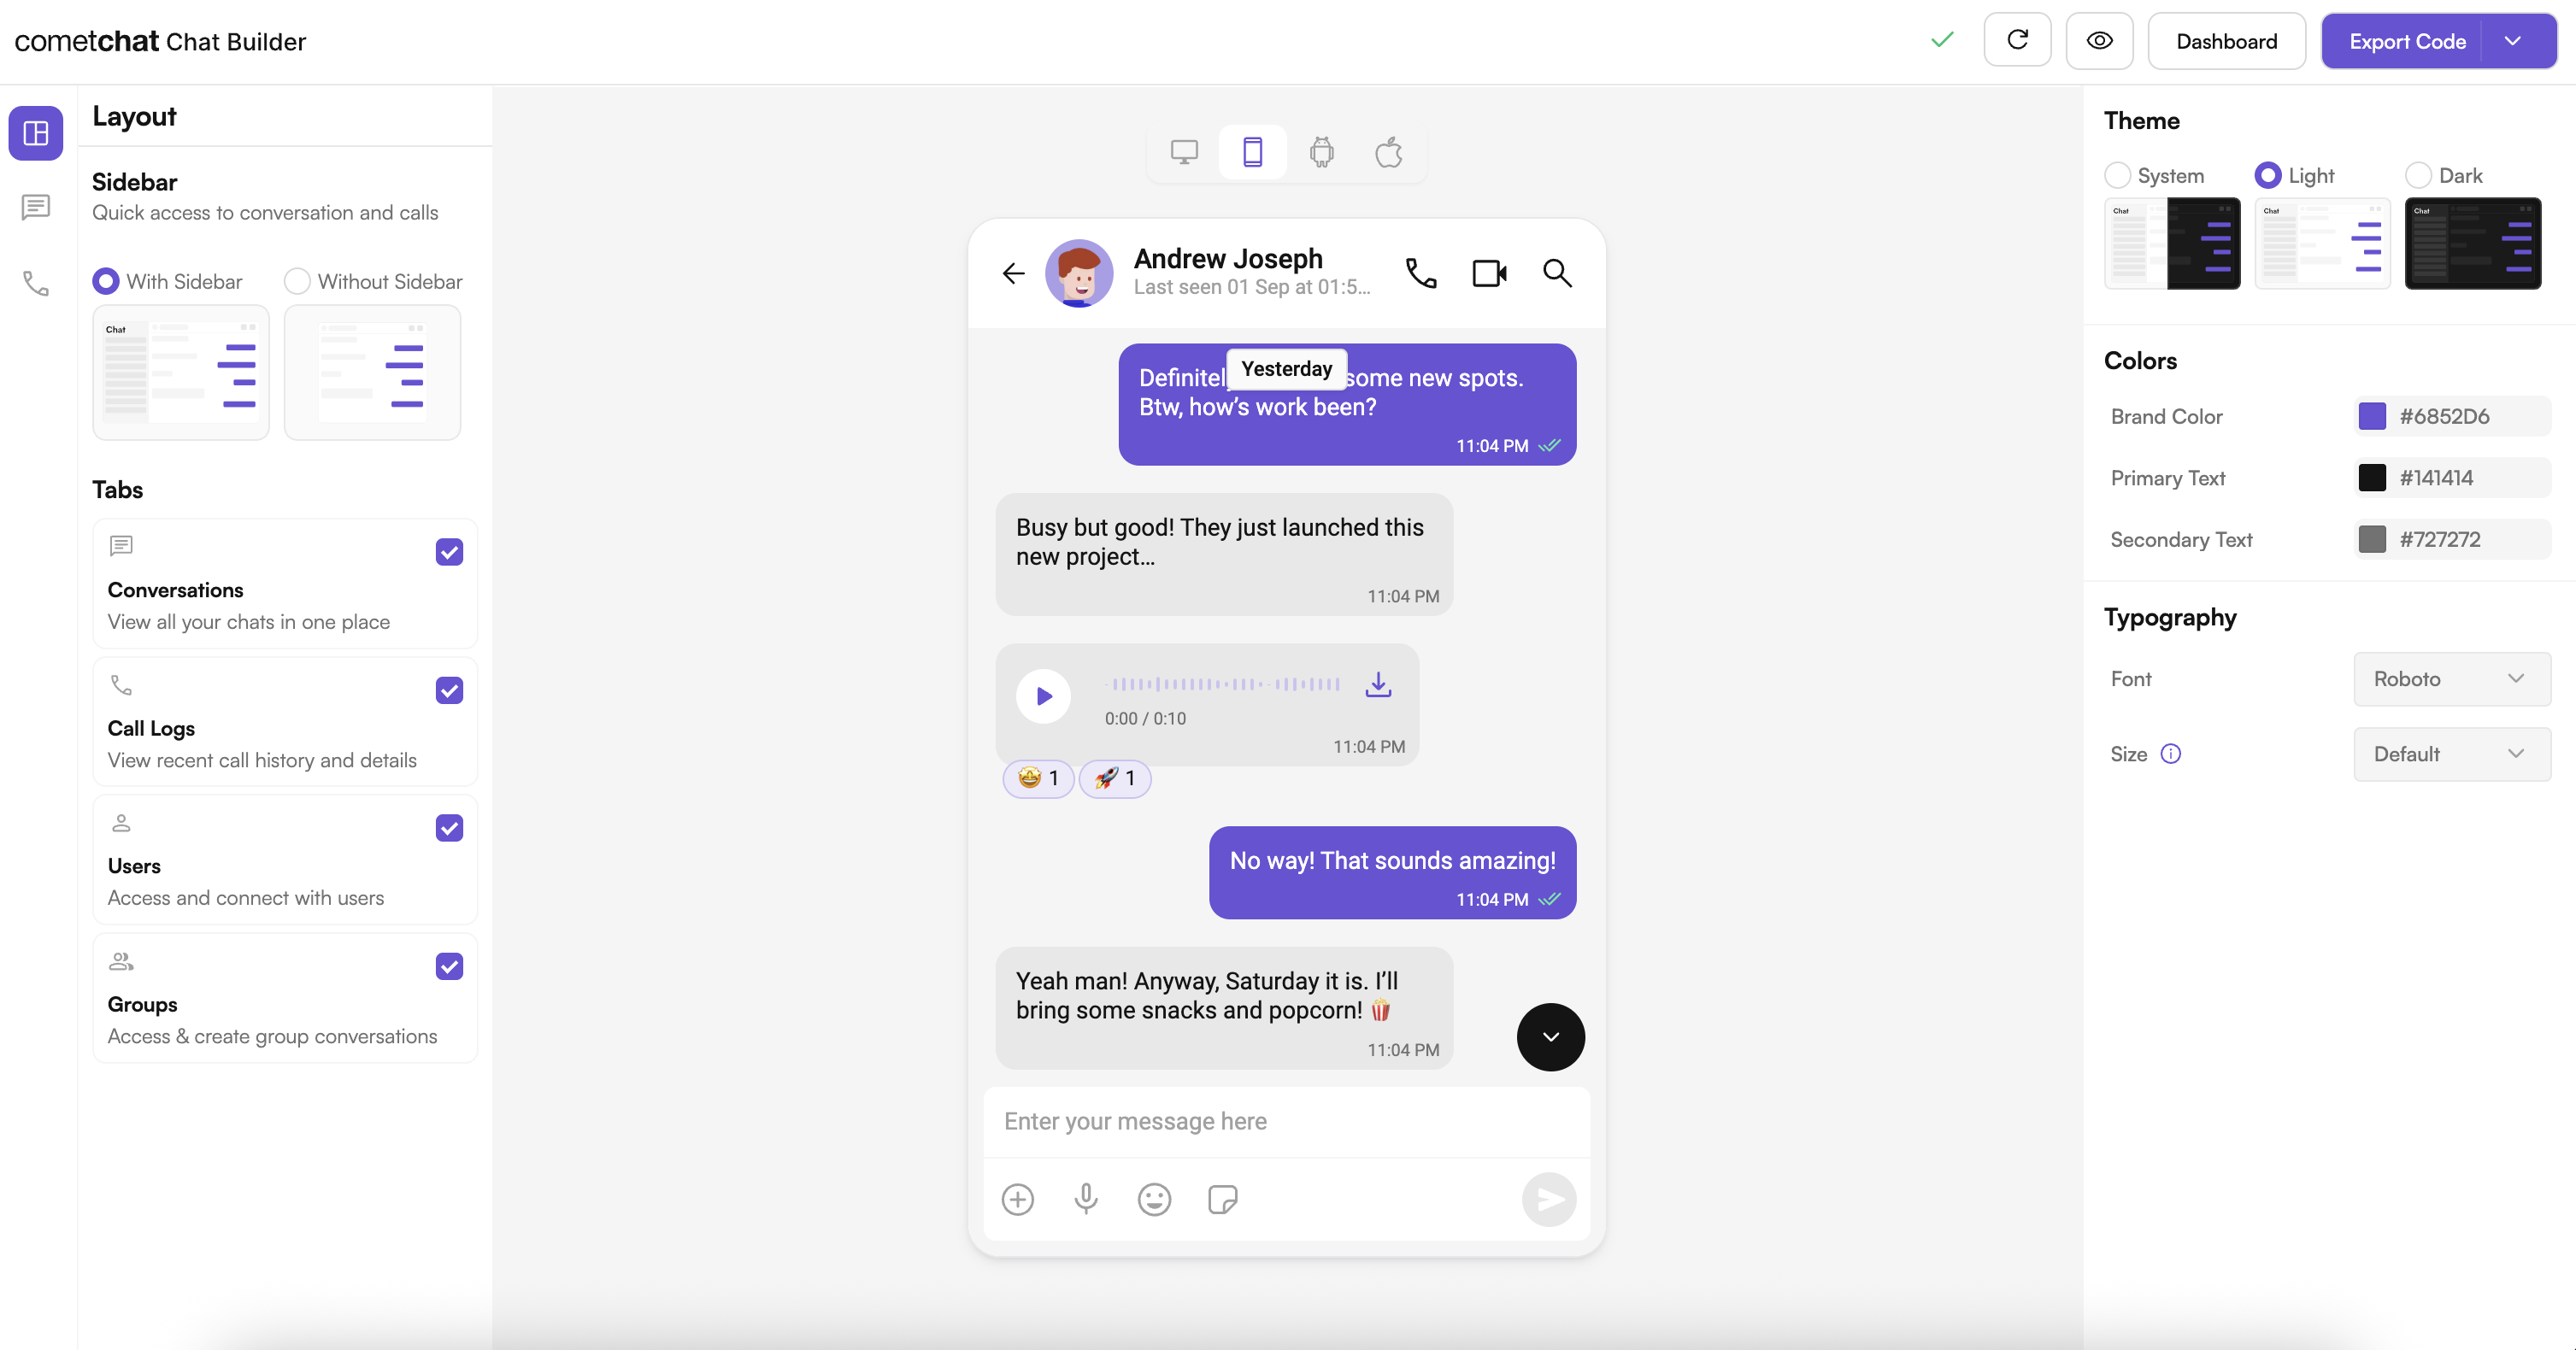
Launch the UI Kit Builder
- Log in to your CometChat Dashboard: https://app.cometchat.com
- Select your application.
- Go to Integrate → Flutter → Launch UI Kit Builder.
Enable Features in CometChat Dashboard
If your app needs any of these, enable them from your Dashboard: https://app.cometchat.com- Stickers
- Polls
- Collaborative whiteboard
- Collaborative document
- Message translation
- AI User Copilot: Conversation starter, Conversation summary, Smart reply
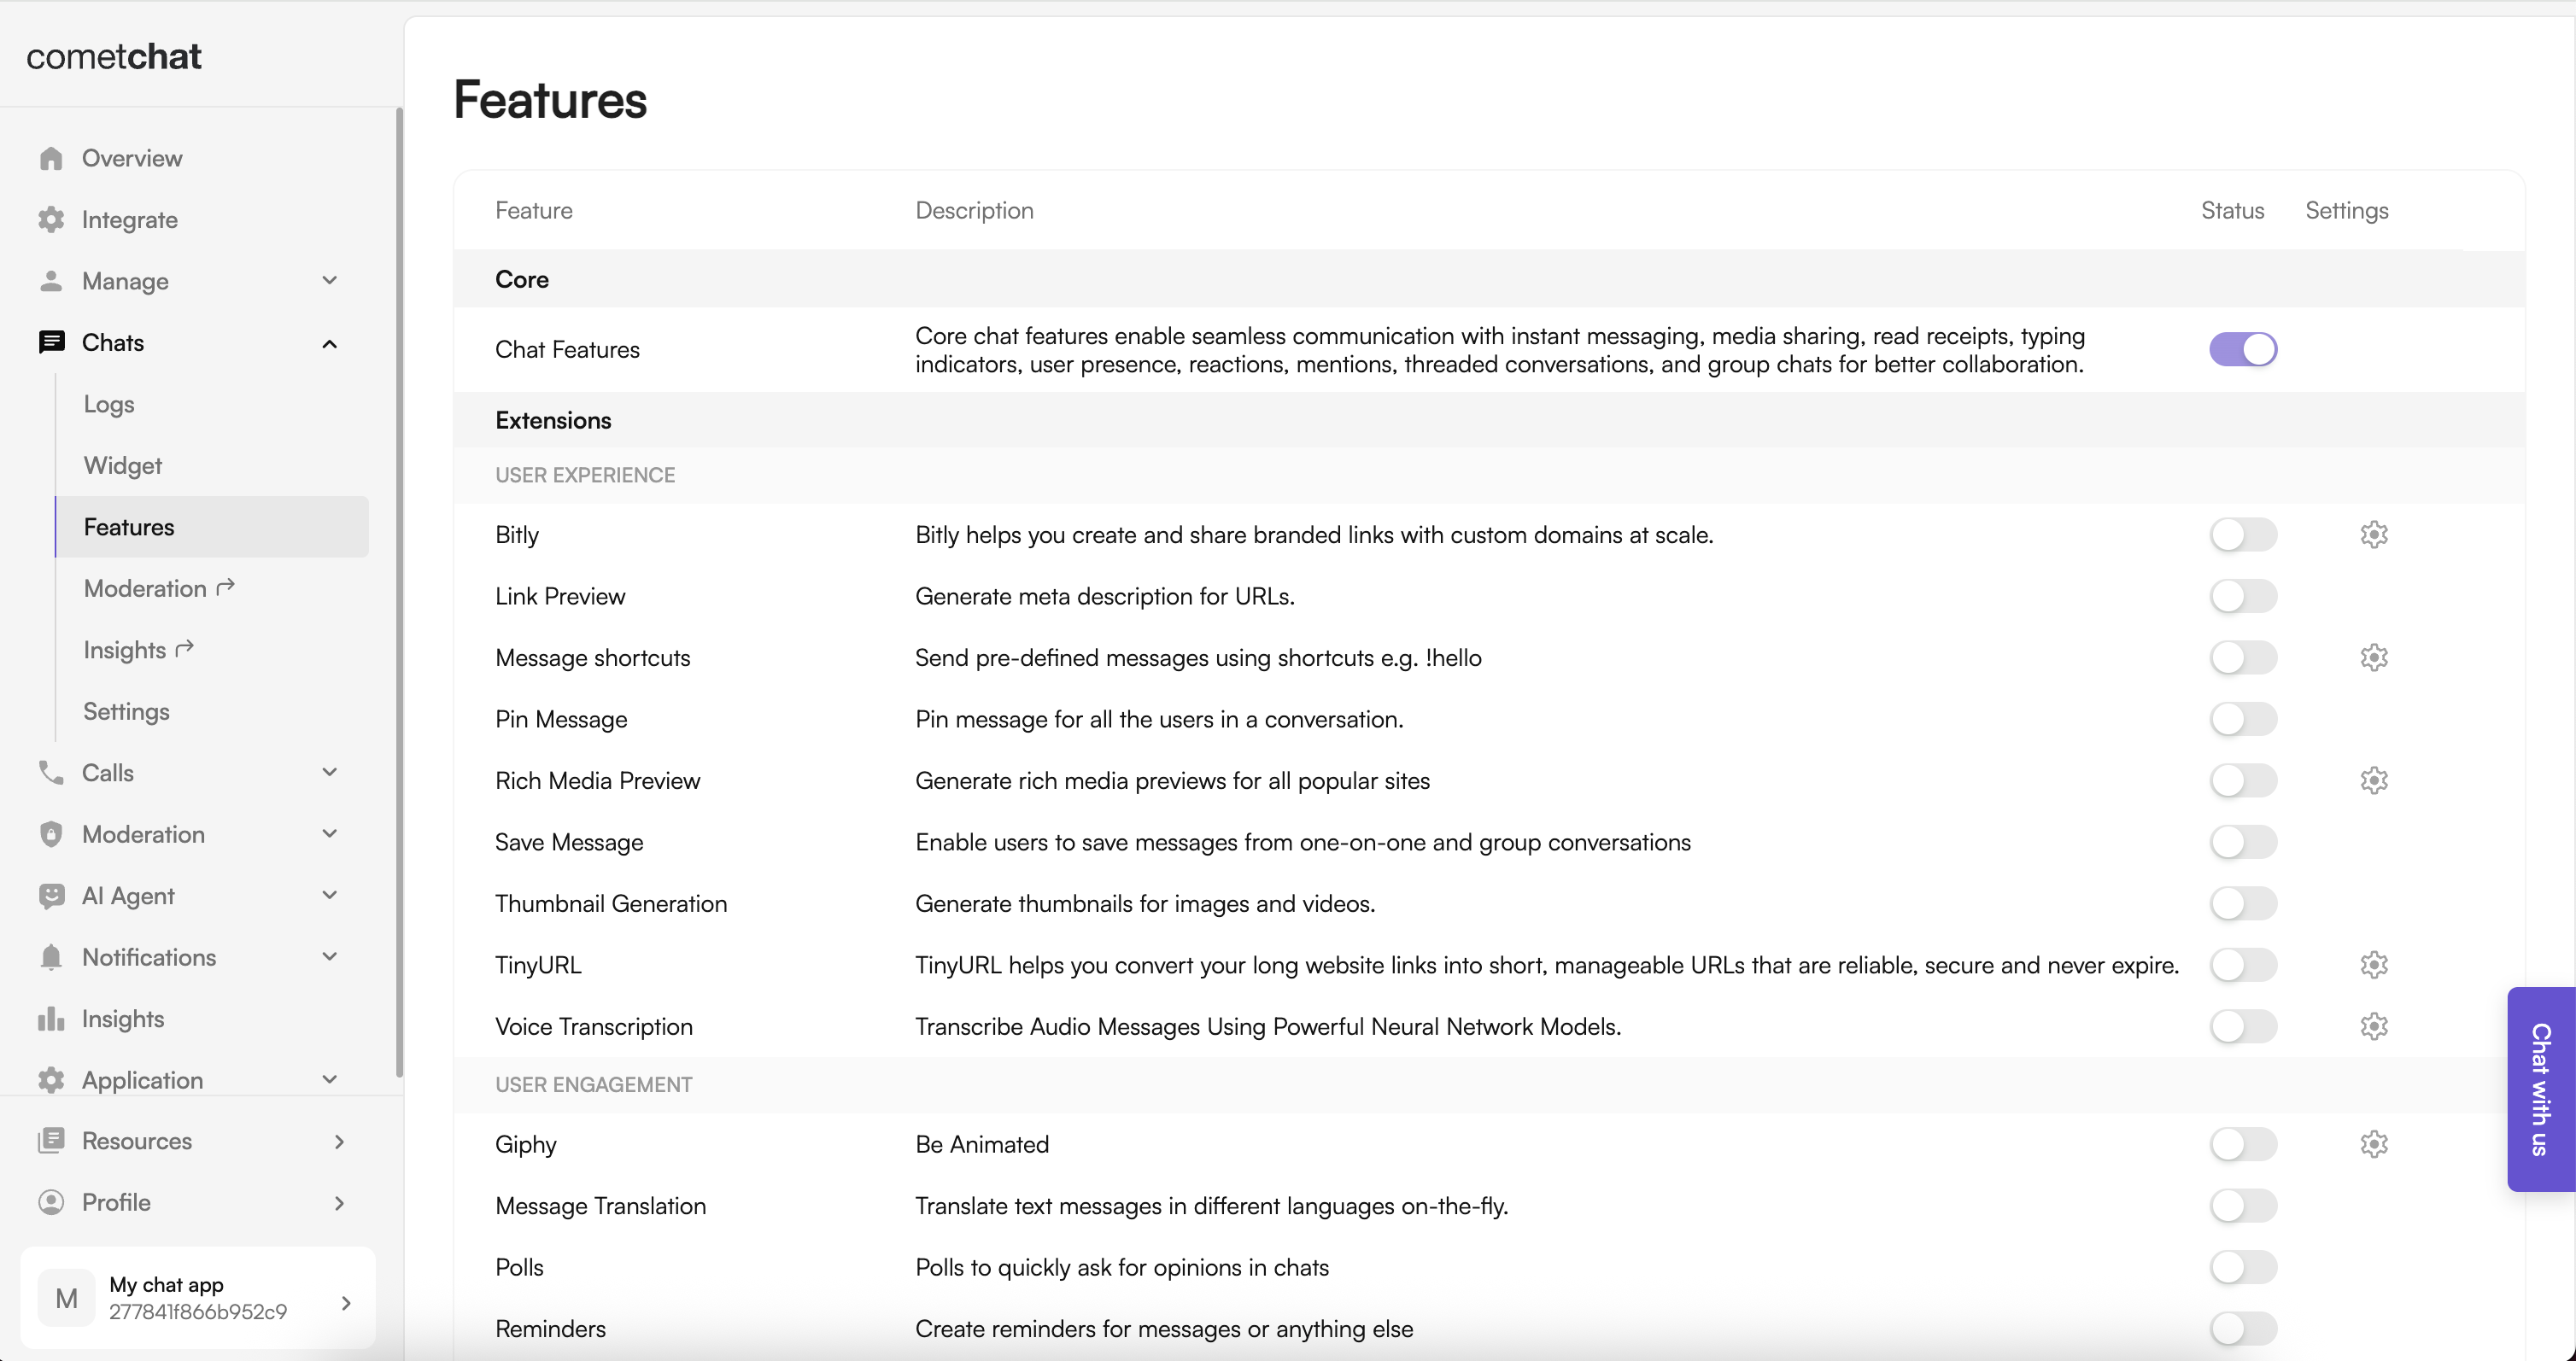
- Log in to the Dashboard.
- Select your app.
- Navigate to Chat → Features.
- Toggle ON the required features and Save.
Integration with CometChat UI Kit Builder
Follow these steps to wire the Builder output into your existing Flutter app.Step 1: Download the Builder package
From the Dashboard export, download the Flutter Builder bundle. Inside you will find achat_builder module, assets, and helper utilities.
Step 2: Add the Builder module to your project
Copy thechat_builder directory into the root of your Flutter project (for example, next to your lib, ios, and android folders).
Step 3: Copy Builder assets
Move the contents ofchat_builder/assets/ into your app’s assets/ directory. Keep the folder structure intact so fonts, JSON files, and images resolve correctly.
Step 4: Update pubspec.yaml
Point to the local Builder module and register the assets and fonts supplied by the export:
Step 5: Install dependencies
Run the following commands at the root of your project:Step 6: Initialize Builder settings before runApp
Import the helper from the Builder module and load settings during app startup:
Step 7: Launch UI Kit Builder screens as needed
Use theChatBuilder APIs to open preconfigured experiences.
-
If CometChat is not initialized or the user is not logged in:
-
If CometChat is initialized and the user is logged in:
Step 8: Refresh settings after configuration updates
Whenever you export a new Builder configuration, replace the generated JSON, fonts, and assets in your project, then rerunflutter pub get to pick up changes.
Available Builder Settings Categories
- Core Messaging Experience — typing indicators, attachments, media, polls.
- Deeper User Engagement — reactions, message translation, stickers, extensions.
- AI User Copilot — smart replies, conversation starters, summaries.
- Group Management — creation, roles, member controls.
- Moderator Controls — kick, ban, mute, report workflows.
- Voice & Video Calling — one-to-one and group calling toggles.
- Layout & Styling — colors, fonts, corner radii, spacing.
Benefits of Using CometChat UI Kit Builder
- Easy configuration: Update experiences without touching Flutter code.
- Type-safe constants: Generated Dart helpers keep settings discoverable.
- Consistent styling: Centralized theming across modules.
- Feature toggling: Enable or disable capabilities dynamically.
- Faster iteration: Designers and developers stay aligned via visual config.
Alternative: Import the CometChatBuilder Sample App as a Module
Prefer a plug-and-play starting point? Import the preconfigured sample module to explore the experience before wiring it into production.- Download the sample from the CometChat Dashboard.
- Open the sample in your IDE and run
flutter pub getfollowed byflutter runto preview the flows. - When ready, add the sample module to your workspace and reference it from your main app via
pathdependencies. - Gradually migrate screens or copy utilities (like
BuilderSettingsHelper) into your production package.
Run the App
After integrating the module, run your Flutter project on an emulator or device:Additional Notes
- Keep the Builder assets in sync with the latest export whenever you change configuration in the dashboard.
- Fonts supplied by the Builder can be swapped for your brand fonts—update the font family definitions in
pubspec.yaml. - For macOS or web targets, guard Builder-specific code with platform checks until those exports are supported.
Troubleshooting
- Builder package not found: Confirm the
chat_builderdirectory path inpubspec.yamlis correct. - Assets missing at runtime: Verify the asset paths in
pubspec.yamland rerunflutter pub get. - iOS build issues: Make sure you ran
pod installinside theiosdirectory after adding the new dependency. - Undefined symbols: Reimport or regenerate the
BuilderSettingsHelperif package paths changed.
Next Steps
- Customize theming with the Flutter UI Kit: Theme introduction
- Explore available components: Components overview
- Dig into API usage: Methods & APIs